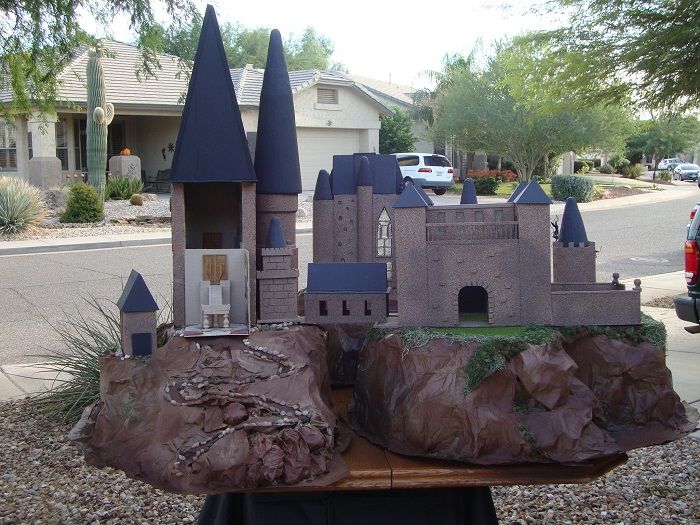
I think I mentioned it in a previous post, but this project was at least five years in the making. It's quite detailed in some places, but the main reason it took so long to finish is because I would take it out and work on it here and there when time would allow. There were also times when I would get stuck on a part of it and would put it away until I figured out what I wanted to do with it. Since I put so much work into the castle, I decided to make a mountain of sorts for it to sit on, so to say. This was made from bankers boxes, newspaper, a solution of wallpaper paste and water, paint in a variety of colors, and an assortment of craft foliage. It also looks really nice when it's dark and I have it lit up. When I was creating it, I always had in mind the fact that I would want to light it up so I made little hallways and other hidey-holes for the tealights. I use electric tealights for the obvious reason that I don't want the thing going up in flames after I put so much time into creating it. Everything was made using styrofoam pieces and an assortment of craft wood that I got at Michaels.
I put it on display in my front yard on Halloween and both the kids and their parents got a kick out of it. It was a lot of fun to make but now that I've had it on display I'm looking forward to moving on to other projects. So I'll pack it up and store it in the garage so I have room in my craft room for other things.
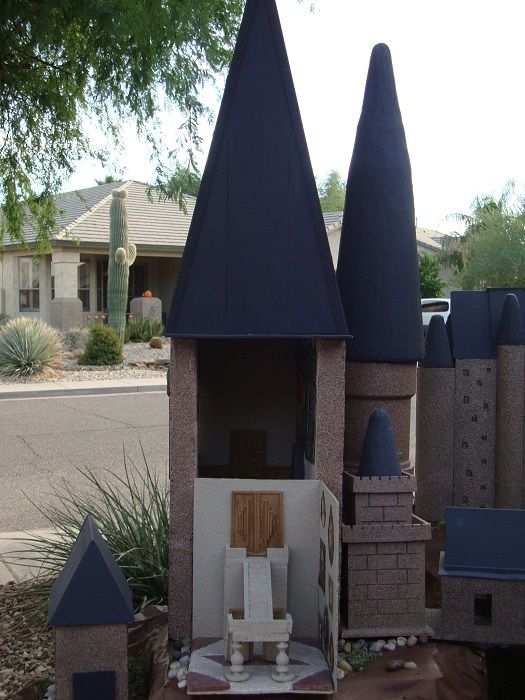
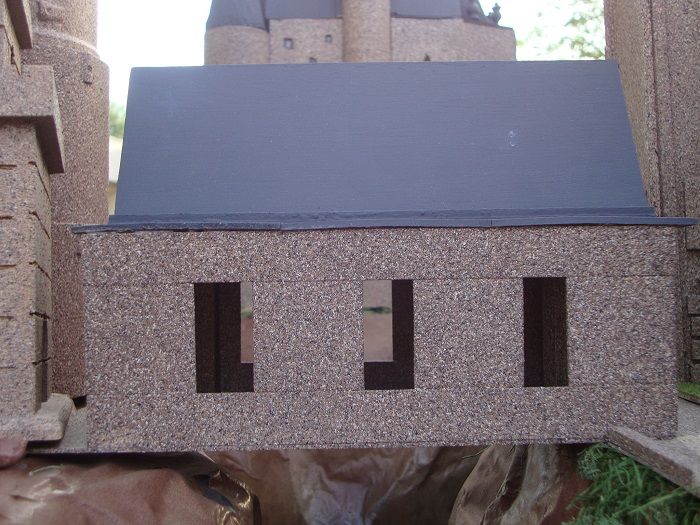
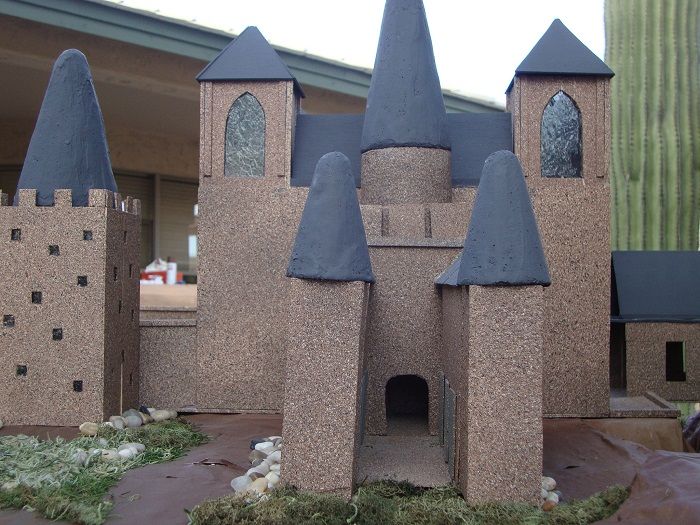
This is the Great Hall with the entryway in front. I decided to make it a cutaway because I made the entryway in such detail. The walls of the Great Hall are made of pieces of styrofoam, and there are two levels to it. (The entryway is covering the lower half in the picture.) I added the lower half for two reasons. The Great Hall itself had to be set up higher to match the door leading to it and, with the addition of the lower half, I could add more windows which would in turn add to the effect when it was lit up.
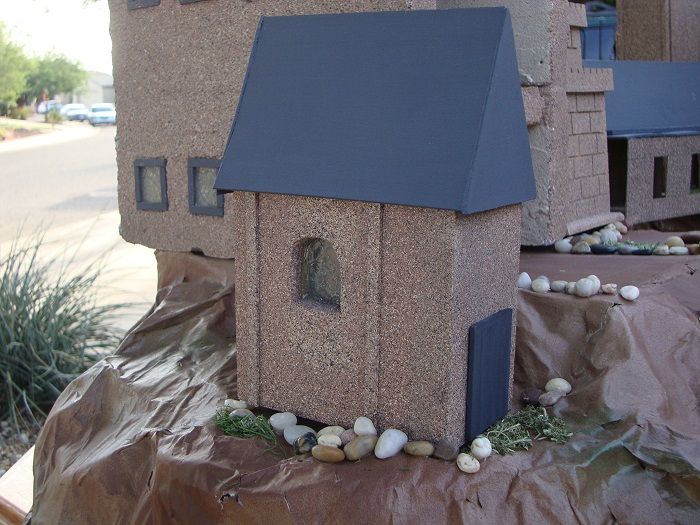
This small building is the only part of the castle that I didn't make myself. I purchased it from Michaels as a plain wooden building, added the top, and spray painted it.
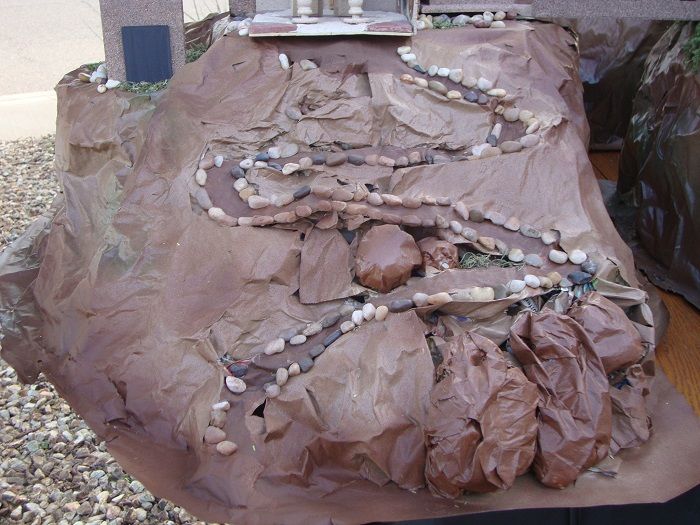
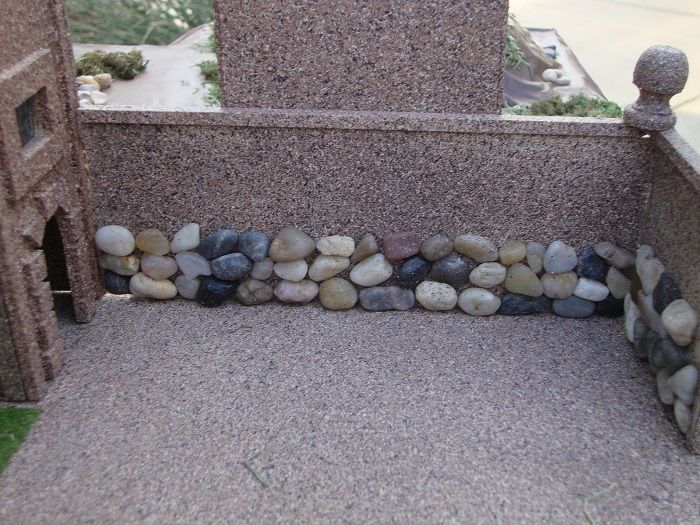
This is a closeup of the mountain I made for the castle to sit on. I just put some bankers boxes together and then filled in the spaces as needed with wadded up newspaper. I then covered everything with a solution of very thin wallpaper paste and water. When it was dry, I painted it using the same leftover paint I had used on Weasleys Wizard Wheezes. I then added a little trail leading up to the entryway to the Great Hall using craft stones before adding some craft foliage. Finally, I used spray paint in colors of brown and green and randomly sprayed different areas to add a little to it.
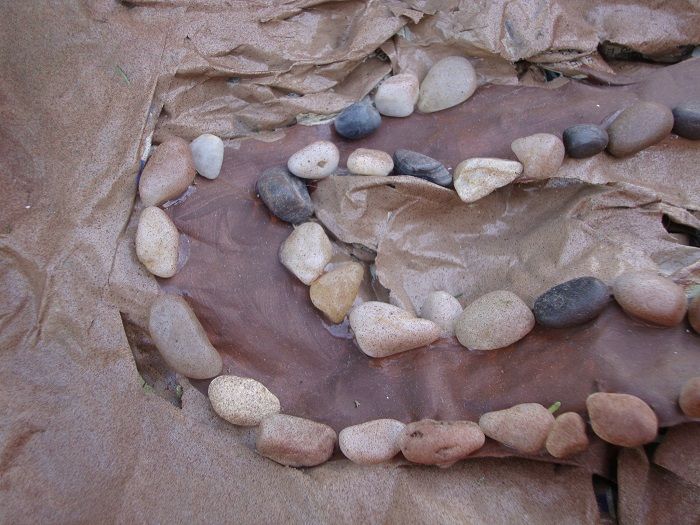
This is a closeup of the little trail I created leading up to the entryway to the Great Hall.
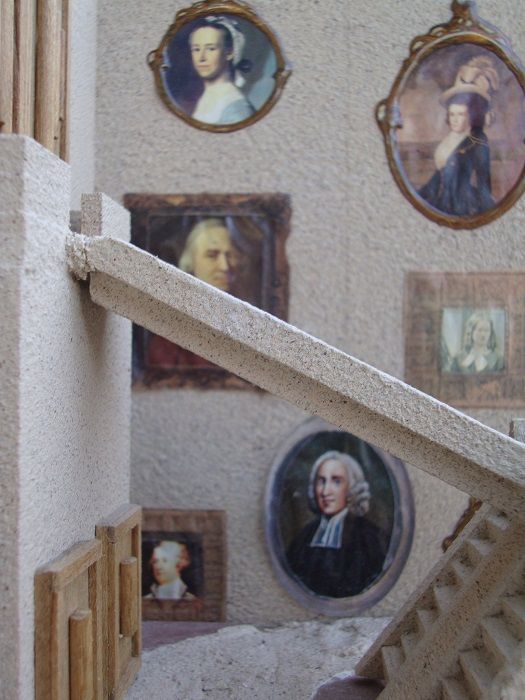
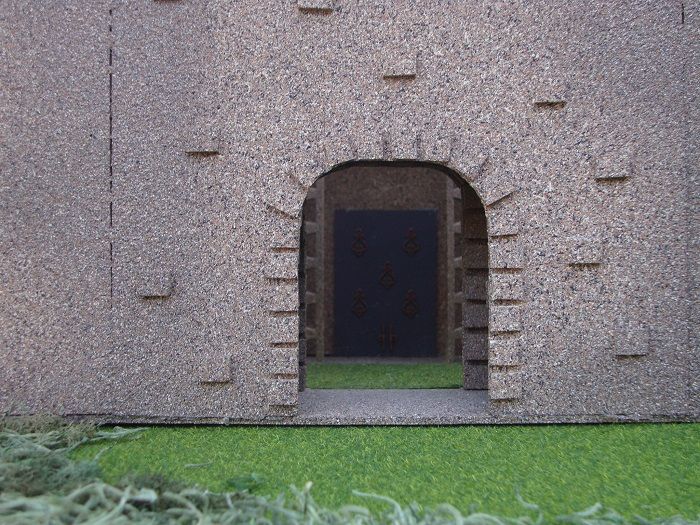
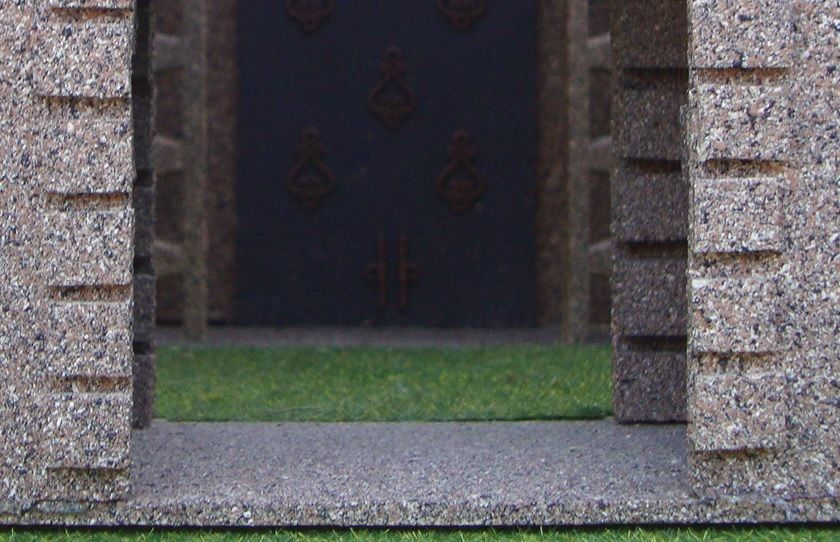
This is a closeup of the entryway. On the walls at Hogwarts are huge pictures of witches and wizards who move in their frames. Note the pictures I used - they are not pictures of witches and wizards! I created the entryway using thin pieces of wood. I then spray painted the walls using Plasti-Kote Fleck Stone Spray Stone Finish in the color Santa Fe Sand, and added the pictures into some frames I had in my craft stash.
I made the stairway using long strips of wood and other small pieces of wood.
The steps were made from a long, thin piece of wood that I cut on the diagonal. It took quite awhile to do and is probably the most detailed part of the castle. For the floor, I arranged pieces of stone I had found at Michaels.
This is a side view of the stairway.
I made the door using strips of wood which I then stained.
This is inside the Great Hall. I need to clean it up a bit, especially the floor. It got a bit dirty when I was touching up the walls and windows. I'll probably re-stain the door and panels on the back wall as well. It's also a bit of a work in progress as I need to make some sort of a staff table and I'd like to do something with the back wall. I'm just not sure what I want to do with it yet. The rugs under the two tables are bookmarks that I found somewhere.
The areas that are cut out are windows.
The fireplace in the Great Hall.
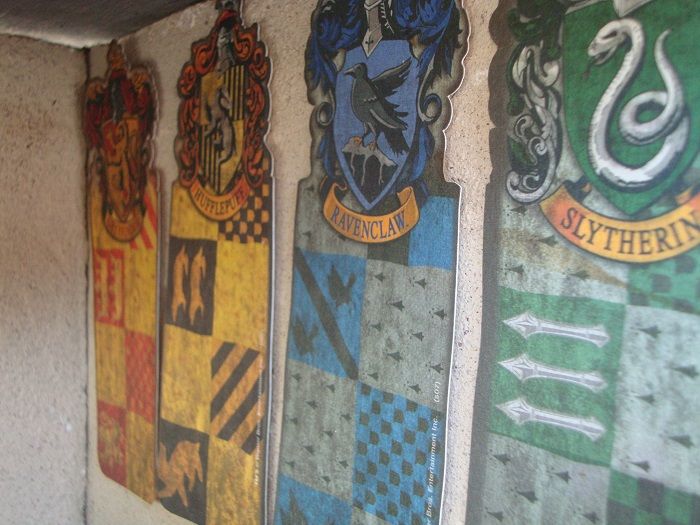
The house banners are bookmarks I picked up somewhere.
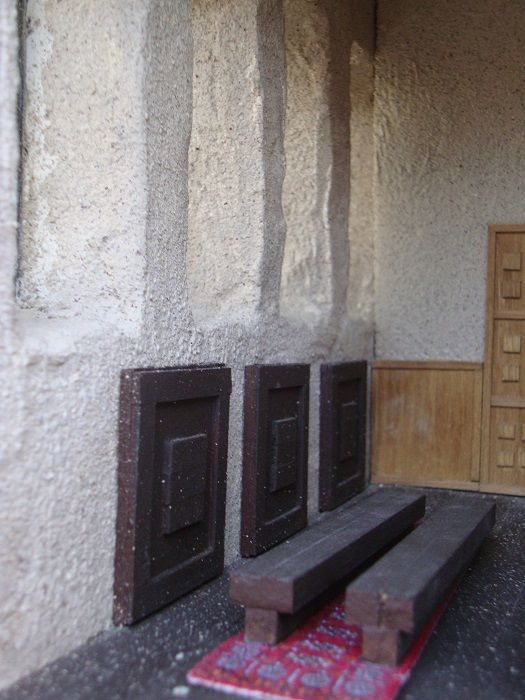
This is the door on the back wall. I'll need to touch it up a bit as it got dirty, and I'll be repainting the floor as well when I get a chance.
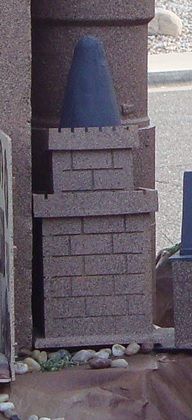
This is the little building that sits to the left of the Great Hall. The outside of the castle is painted with Rust-Oleum American Accents Stone in the color Sienna Tone.
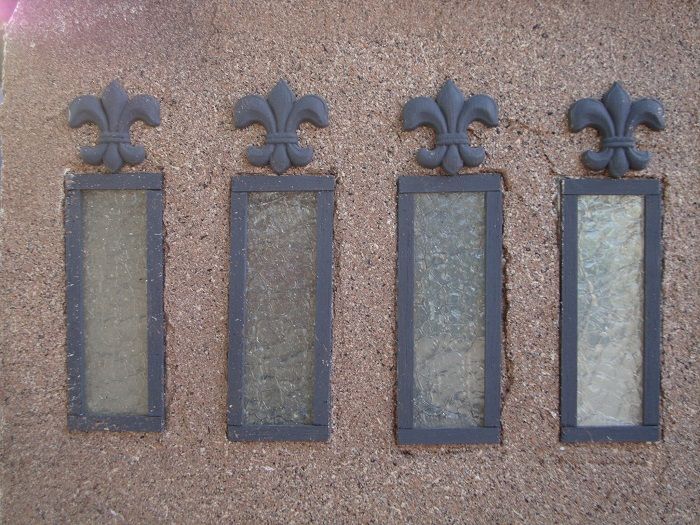
This is a view of the windows in the Great Hall as they appear from the outside. They actually started out as a liquid. I cut a piece of very thin hard plastic to fit the openings I had cut. Once I had the piece of plastic fitted into the window opening, I used a product called Gallery Glass in Crystal Clear to create the window. Once it was dry, I was able to remove the plastic. I then put another layer on the window but this time used Gallery Glass in Crackle Medium. It gives the window a really interesting look and looks nice when the castle is lit up.
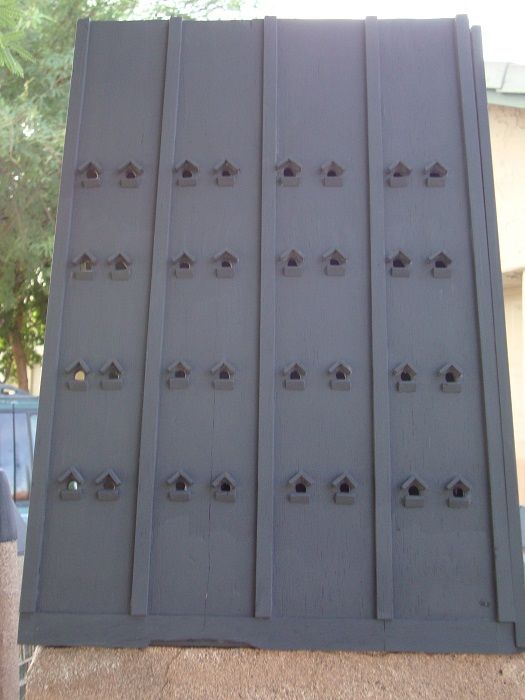
The roof of the Great Hall started out as four pieces of thin wood. I cut holes in them using a Dremel and then made little roofs, so to say, over each hole. This was actually a fairly time-consuming part of the project but I like the way it turned out and I designed it with the back of it open so that I could put tealights inside.
This is a little bridge that connects the Great Hall with the rest of the castle.
The black area you see in the middle of the picture is a door. Between the opening at the front and the door are two hallways and a little courtyard. One of the hallways is right behind the opening seen at the front, and one of the hallways is right in front of the door.
This is another little area that is right of the hallways and courtyard in the previous picture.
This is the doorway that can be seen in the previous picture. It leads into the courtyard.
This is from the right side of the castle looking through the courtyard toward the Great Hall.
The back of the castle.
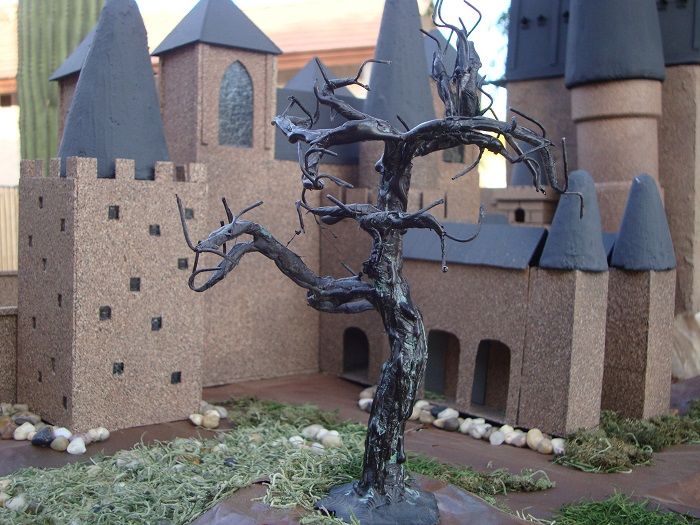
The Whomping Willow
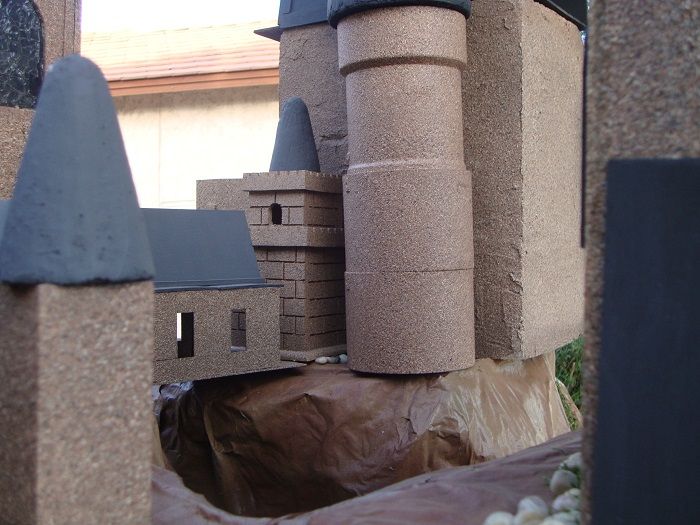
The tower seen in the middle of the picture is made from some sort of pipe tubing.
This building is separate from the rest of the castle. I used both wood and pipe tubing to make it.
This is a picture of the base of the building in the previous picture.