Monday, October 28, 2013

Harry Potter Crafts - Monster Book of Monsters

The Monster Book of Monsters was the required textbook for Care of Magical Creatures when Hagrid taught the class in Harry's third year.  When the belt was removed, the book would bite anyone who tried to touch it.


I couldn't bring myself to destroy a real book to make this, so I went looking at the craft store for an alternative.  Sure enough, I found a cardboard box that was in the shape of a book at Michaels.  I covered it with fun fur and then cut out spaces for the title of the book.  I covered this area with brown felt.  I used red craft rocks for the eyes of the book.  I don't recall where I found the belt, but I thought it was perfect for the book. 


 I used felt lettering for the title of the book.


This is the inside of the book.  I cut up light grey copy paper, stacked it, and then placed it inside the book to create the pages.  I then decided to cut a square out of the middle of it so that the book could double as a little purse for carrying along with a Harry Potter related costume on Halloween.  


Harry Potter Crafts - Portable Swamp

The Portable Swamp was created by Fred and George Weasley to annoy Professor Umbridge.  When deployed, it will cover the target area and is sold in Weasleys Wizard Wheezes.

This was a really quick project to complete.  I used a small glass bowl that can be found at any craft store.  I then added some craft foliage and a couple of creatures to complete it. 


Just for fun I added a little tag that reads - "Portable Swamp - Perfect for the broomstick-riding rantipole in need of a highly-effective, cost-effective prank.  Disclaimer - The owners of Weasleys Wizard Wheezes are not responsible for the consequences should the purchaser of our product voluntarily violate the Decree for the Reasonable Restriction of Underage Sorcery.  Priced at 10 Galleons"


I purchased this little potion bottle at a craft store and added a little bit of colored liquid to be used to activate the swamp.  The color of the liquid turned out perfect - kind of a murky blue-green.


I wrote a tag for the liquid that reads - "Instructions for Activation - Use dropper to add swamp water (included in purchase price) to extent necessary to achieve desired result.  (Engorgement Charm may be necessary in some cases - instructions included.)


This is just a view of the Portable Swamp from the top.


Sunday, October 27, 2013

Harry Potter Crafts - Forbidden Forest


This was a fun project to complete and the first time I made "pipe cleaner" trees.  For the floor of the forest, I just taped together pieces of thin cardboard.  I then used chicken wire to create some hills which were covered with paper dipped in a very thin wallpaper paste.  I then painted it using varying shades of brown and green paint.  Next I added some craft foliage.  Finally, I added headstones, gargoyles, dragons, and other creepy things. 


I made some rocks by balling up newspaper, covering them with pieces dipped in the wallpaper paste solution, and painting them. 


To make these trees, I took the cardboard tube from a roll of paper towels and taped pipe cleaners randomly to it.  Some I would begin at the bottom and others I would begin half way up or three-quarters way up.  I then bent them at different angles.  I then filled in the trunk using wadded up newspaper.  When I say I filled it in, I mean on the outside between the pipe cleaners.  The tube is hollow except for the top.  Again, I just wadded up some newspaper and stuffed it in the top of the cardboard tube.  I then covered everything with newspaper dipped in the wallpaper paste solution.  It took some time to do this because I had to use really small, thin pieces to wrap the branches. 


Friday, October 25, 2013

Titan II Museum – Arizona - Launch Complex 571-7

Titan II Missile Museum


Dad and I visited the Titan Missile Museum, which is south of Tuscon, when he was here visiting about two years ago.  This is the only site that remains – the rest have been filled in and/or destroyed.  It was an amazing experience and I highly recommend it for anyone interested in these kinds of things.  Here, one can see a Titan II missile, the largest ballistic missile developed by the United States, still housed in the silo where it’s been since the Cold War.  The Titan II missile can carry a warhead of over nine megatons or the equivalent of over nine million tons of TNT and can deliver it anywhere within 5,500 miles in less than half an hour.  Although “the Titan II and the other missiles that sat waiting in their silos represented humanity’s ability to destroy itself,” it also served a number of other purposes.  It launched the Gemini Program’s astronauts into orbit, sent the Viking probe to Mars, and launched the Voyager into the outer solar system.  When they were no longer used as weapons systems, reused Titans became the basis for rockets that have launched dozens of satellites into orbit.  But perhaps the most important function of the Titan II missile was, given its existence as a weapon, to help prevent a war between the United States and the Soviet Union.  

Below are a few pictures I took while on the tour.  I didn’t take a lot of pictures when I was on the tour which is odd because I’m usually all about the pictures.  I think I was just so fascinated by everything that I didn’t think of it.   


Off in the distance is the silo closure door.


The above reads: 

"In September 1981, the Reagan administration decided to deactivate the Titan II ICBMs.  Over the next few years the missiles were removed from the silos and placed in storage for use in launching satellites.  In order to assure the Soviet Union that the silos were being deactivated according to the SALT treaty each silo was first stripped of useful equipment and then the top 25 feet of the silo was blown apart using 2,800 pounds of explosives.  After being left exposed for several months so that Soviet satellites could verify the destruction the remains were filled in and covered to look as much like the surrounding area as possible.  Only one silo escaped destruction to become the Titan Missile Museum." 


The above reads: 

"Over the history of the Titan II missile there were five fatal accidents at operational missile silos.  While it did not result in the most deaths, the accident that took place September 18-19, 1980 was the most spectacular.  In the late afternoon of the 18th a maintenance man working in the silo accidentally dropped a nearly nine pound socket which bounced down the silo eventually hitting the missile and creating a leak from the Stage I fuel tank.  Over the next few hours the silo was evacuated while crews worked to vent the fuel vapors.  At 3 AM on the 19th, just after two RFHCO suited crewmen had returned to the surface from taking readings in the silo, a massive explosion ripped through the silo.  The force of the blast blew the 760 ton silo closure door several hundred feet into the air, it eventually came to rest over 700 feet away.  The second stage of the missile was blown out of the silo where its ruptured fuel tanks exploded.  Fortunately, the reentry vehicle and the nuclear warhead were thrown clear by this explosion.  The warhead was found several hundred feet from the silo, damaged but intact.  One of the two crewmen directly above the silo at the time of the explosion, Senior Airman David L. Livingston was killed, but the other received relatively minor injuries despite having been thrown 150 feet." 


The 390th Strategic Missile Wing's Road Runner Mascot


The above reads: 

"The filing cabinet in which the launch keys and codes were kept.  The Crew Commander and Deputy each had a combination to one of the two locks on the safe.  When a launch order was received they would open the safe and verify the codes before beginning the launch procedures that would fire the missile." 


The Viewing Platform


The Titan II's engines


A view of the Titan II from the Viewing Platform


The Control Center

The Control Center

A view of the Titan II inside the silo. 


Another view of the missile inside the silo.


The silo closure door

Before seeing the missile, we viewed a short film tiled “Titan II – Peace Through Deterrence” which was basically about what we would be seeing on the tour as well as providing some information about nuclear war and the concept of “Peace Through Deterrence.”  (You can view the film in its entirety in Part 1 of the video series which I have linked below.)  The U.S. Nuclear Missile Program was designed not so much to fight a nuclear war, but to prevent one from starting in the first place.  This concept is called “Peace Through Deterrence” and mutual assured destruction (MAD) was the driving force behind it. 

There were originally fifty-four Titan missiles in the United States and they were in Arkansas, Kansas, and Arizona – eighteen in each state.  In the room in which we viewed the film was a map of all the Titan sites around Tuscon.  According to the guide, most people didn’t even know they were here.  It’s just mind-boggling to think that there were once eighteen missiles right here in Arizona ready to bomb the Soviet Union at a moment’s notice. 

After we viewed the film, we went outside and learned a little bit about the propellants involved.  We then saw the engines of the missile and learned a little bit about how they operate.  From there, we went over to the viewing platform where one can see the missile from above as it sits in the silo.  The silo is 26 ½ feet in diameter and 146 feet deep (the equivalent of a 15-story building).  It’s astounding to me that this is all buried in the Earth.  Seeing the Titan Missile II from above the way we did was an experience I’ll never forget.  You can see some good footage of it in Part 2 of the video series linked below. 
  
We then saw the blast door.  A sign on it reads:

“760 Tons of Concrete and Steel - Normally Fully Closed - Hydraulically Operated - Opens Automatically During Launch, Countdown, or By Control Panel During Standby – Note:  Door Is Now Permanently Blocked Half Open”
We then made our way over to the crew entrance (entrance portal) where the guide told us a little bit about how the day began for the crew.  Their tour of duty would be twenty-four hours.  We then took the same route the crew would have taken down the steps.  The guide told us a little bit about “soft” and “hard” with respect to the quality of construction.  The area we had just come down would be considered “soft” and would likely be reduced to rubble in the event of a nuclear explosion.  The area that we were about to enter was another matter.  It was considered “hard” with respect to the quality of construction.  We were shown a wall that was about four feet thick which was interspersed with reinforcing bar.  The guide tells us a little bit about how this area was constructed to avoid any weak spots.  You can hear this explanation in Part 4 of the video series linked belowHe then goes on to tell us about how the crew opened/operated the blast doors. 

We then made our way to the control room where we got an explanation of what “shock isolation” is among many other things.  It was very interesting and I highly recommend that you watch Part 4 of the video series linked below as there is too much to list here.  One thing that I wanted to mention though is the series of events that must take place to launch the missile.  The guide took us through a simulated launch.  The President of the United States is the only person who can authorize the launch and the only time the United States would launch one of the missiles is in retaliation for being attacked.  So the President makes the decision to launch one of the missiles.  Within minutes, four speakers go off.  The first is linked to the 15th Air Force Base, Riverside California and the second is linked to the Offutt Air Force Base in Nebraska.  The stronger of the two is picked and a 15-digit structured message is copied down in the code book.  When both crew members have heard the code and copied it down, they exchange code books and listen to it again.  If both are convinced that they have heard it the same, it becomes authorization to take the duel locks off the safe.  The safe is opened revealing ten to twelve authenticator cards and at this point the crew is asking themselves “Did the President really instruct us to launch this missile?”  Each authenticator card has two digits.  The message received before tells the crew which authenticator card to take.  The card is cracked open; the five digits on the inside must match what came in on the original message.  If this is the case, the President has authorized the launch.  In addition to the authenticator cards, in the safe there are two keys.  One key is for the Commander and one key is for the Deputy Commander.  The two places in which the keys are placed are far enough apart that one person would not be able to turn both keys at once, which is what is needed for the launch.  In addition, they are spring-loaded to the off position.  The two keys must be turned within two seconds of each other and must be held for five seconds to initiate the launch.  Fascinating!  Seriously, if you’re at all interested in this (and if you’re still reading you must be!) please watch Part 4 in the series linked below to see the guide explaining this.  In addition, the guy filming the video series has a close-up of the key and the control panel as the key is turned.  From the time the key is turned until the missile is out of the silo is about 58 seconds and in 30 – 35 seconds the missile will hit its target.  

Next we were off to the silo to see the missile itself.  We walked down a “hallway” of sorts to get to it.  It was so much bigger than I thought it would be when Dad first suggested going to see it.  Neil Armstrong took his first flight up into space on top of a Titan II missile.  The last Titan II was launched in October of 2003.   
  
A person by the name of Tim Buktu from New York taped the entire tour when he visited the museum.  I believe he posted the videos approximately two months ago but it looks like he was there only a few months before I was a couple of years ago according to the date on an “I Turned the Key” card he had.  If you want a comprehensive look at the tour, I recommend watching the videos he’s posted on YouTube.  Below, I’ve posted links to the videos as well as a short summary of what is on each video.  I’m so grateful that he posted these videos because I saw all of this and now have a nice record of my trip there.  The guy filming asked a lot of good questions and was making comments as well so you’ll learn a lot watching the videos.  
 

The first video in the series is approximately twenty-two minutes long.  There are a number of informative cards in the entry of the museum and he reads a couple of them before being called for the 3:30 tour.  He relayed information on the Cold War, the Titan II missile, the origins of space flight rockets, and a timeline of the Cold War. He records the map of the eighteen missile sights around Tuscon as well as the film “Titan II – Peace through Deterrence” in its entirety.  I really recommend watching it as you can see one of the missiles being launched at the beginning of it as well as hear an explanation of the idea of “Peace Through Deterrence.”    


The second video is approximately thirteen minutes long and begins when we first stepped outside after viewing the film.  It was apparently windy that day so it’s a bit tough to hear in some places but it’s still worth a look for the information on the propellants.  You’ll also be able to see the engines of the missile and hear what the guide had to say about how they operate, as well as the viewing platform.  Finally, he gets some really good shots of the Titan II from above as it sits in the silo.  


Titan Missile Museum - Green Valley - Arizona (3)


The third video is a little over five minutes and begins with more footage of the Titan II missile as seen from the viewing platform.  He then gets some footage of the blast door and the entrance portal.
 
Titan Missile Museum - Green Valley - Arizona (4)


The fourth video is a little over twenty-one minutes and begins with the descent down the stairs.  It contains an explanation by the guide of how the area in which the crew would be was constructed to avoid any weak spots in the construction.  This part of the series is interesting because he also filmed his time in the control room where the guide explained a number of things to us.  He also took us through a simulated launch.  Fascinating stuff.

Titan Missile Museum - Green Valley - Arizona (5)


The fifth video is only four minutes long but it’s worth looking at as you can see the “hallway” we walked down to get to the silo where the missile is housed as well as the missile itself.  He does a really good job of getting footage of both the missile and the inside of the silo.       
 
Titan Missile Museum - Green Valley - Arizona (6)


The sixth video is only 12 seconds long but I included it in the interest of completeness. 
 
Titan Missile Museum - Green Valley - Arizona (7 last)


The seventh video is approximately twenty minutes long and begins with him going around the gift shop and entryway where, in addition to souvenirs available for purchase, there are more information cards.  You may want to watch this video if you’re interested in learning more about the awful accident that happened at one of the missile sites in 1980.  There were a total of five fatal accidents at operational missile sites.  He then picks up where he left off on the timeline before the tour began.       

This truly is an amazing place to visit and I highly recommend it to anyone who is interested in world history, United States history, and/or Arizona history.  


Sunday, October 20, 2013

Hogwarts Halloween Goodie Bags

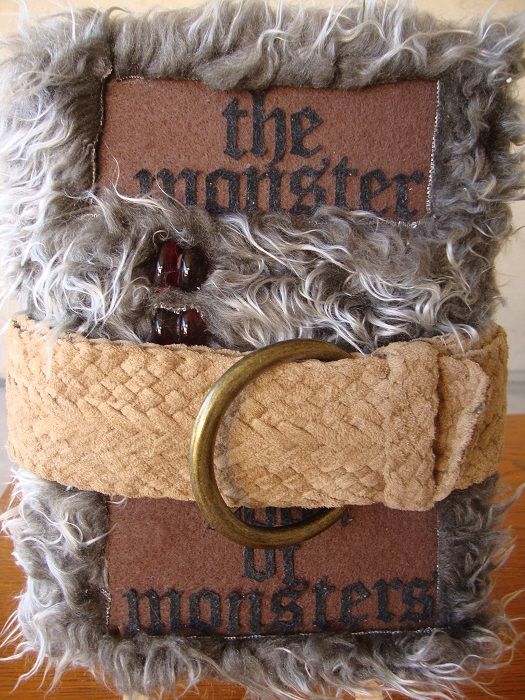
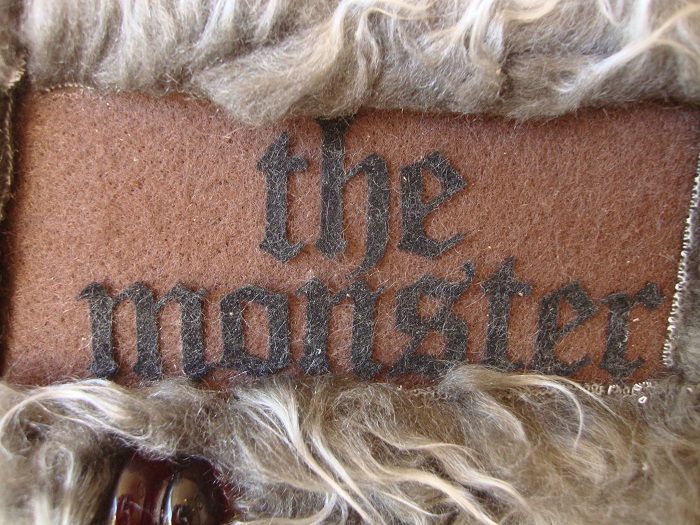
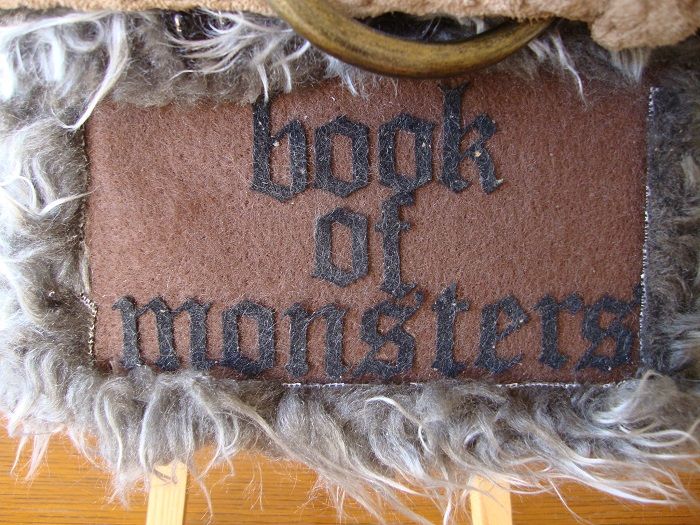
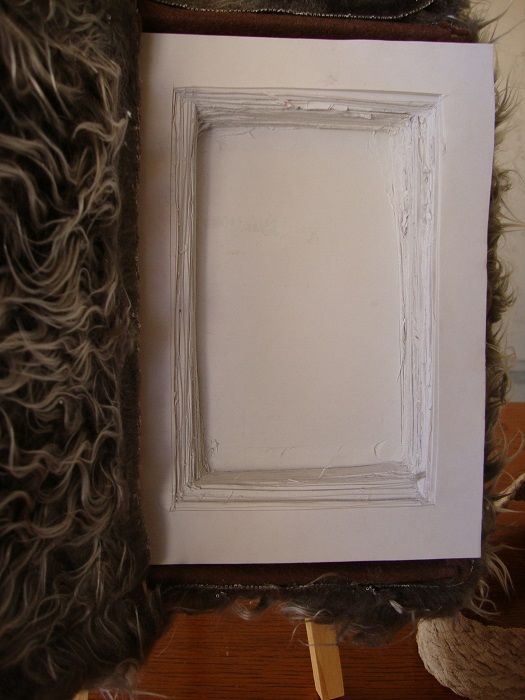
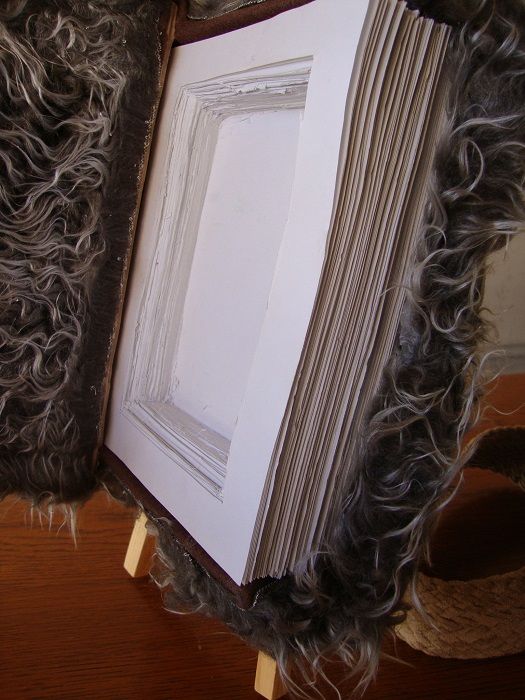
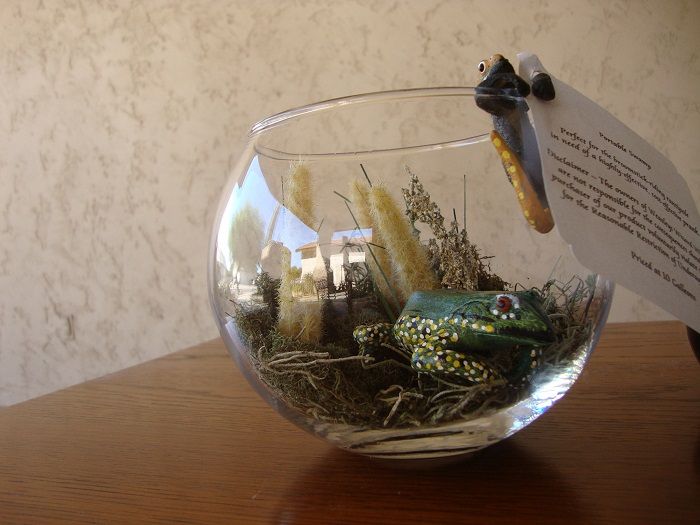
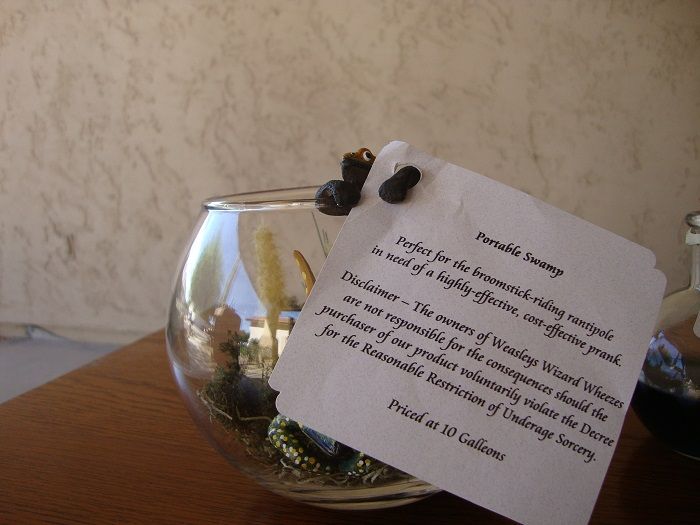
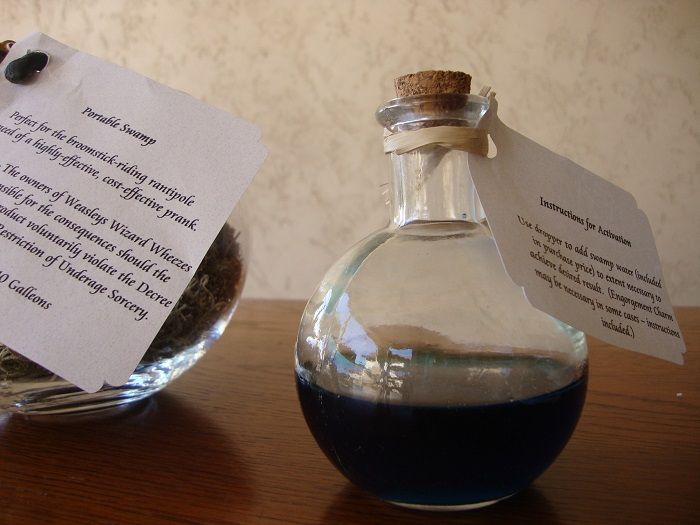
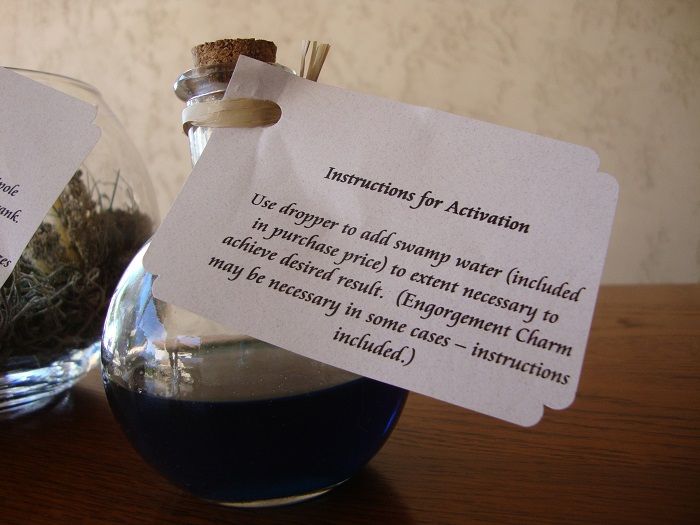
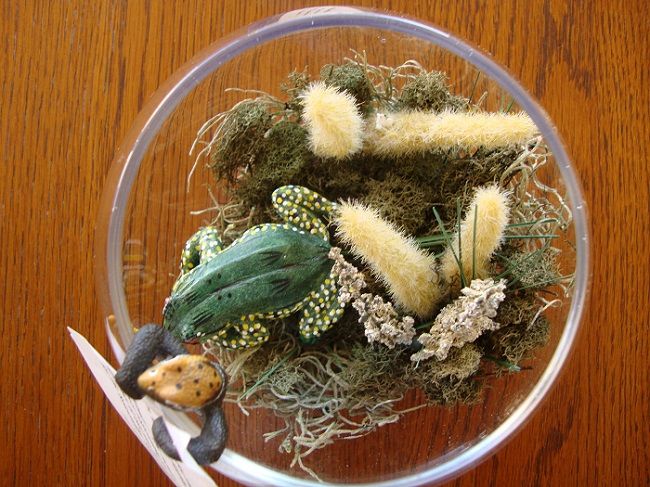
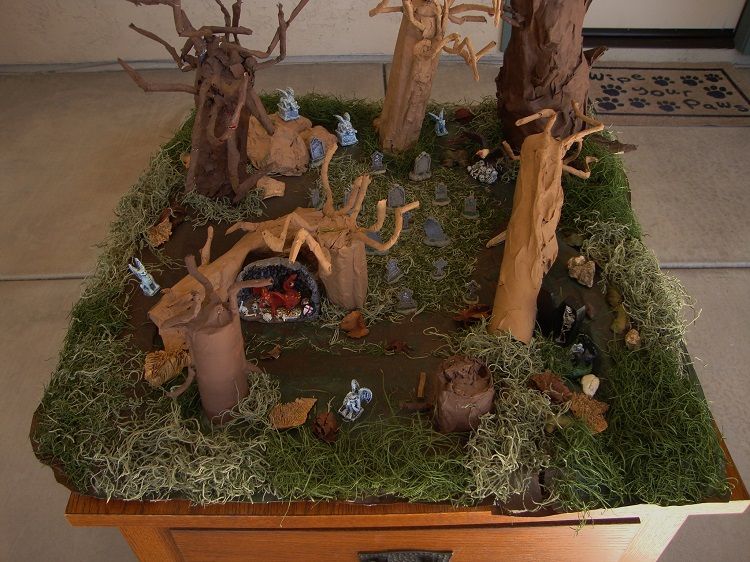
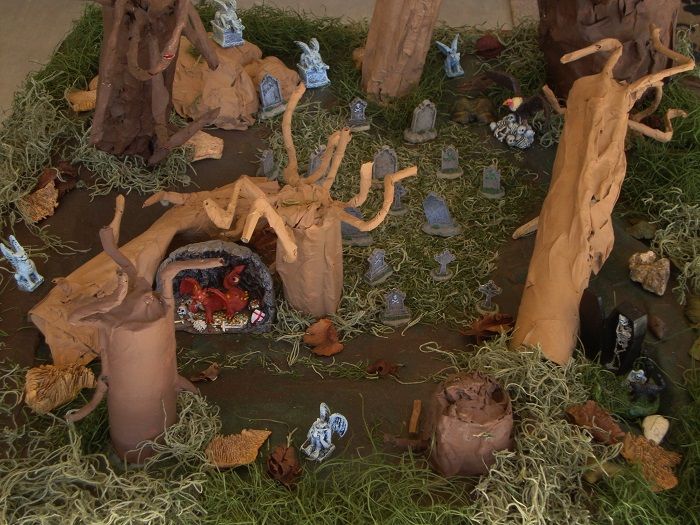
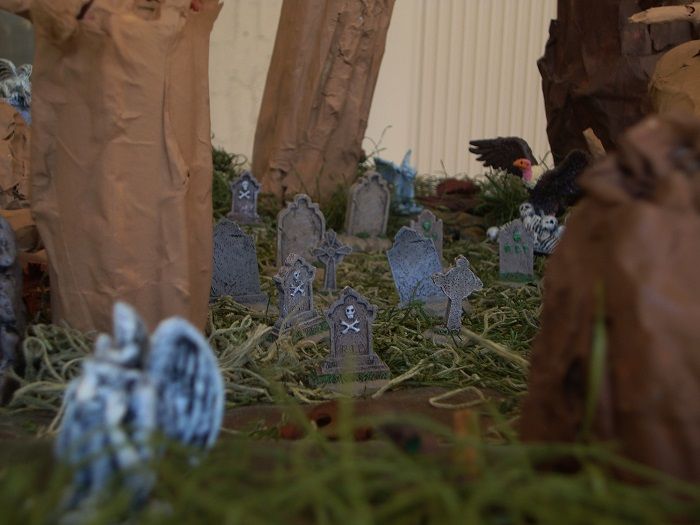
This year for Halloween I thought I'd put together a Hogwarts theme for the kiddos.  Over the course of about the past five years, I've made a number of Harry Potter related craft projects including a model of the castle that takes approximately 30-35 battery operated tealights to light up.  I've also made a Forbidden Forest, a little Hagrid's Hut, Weasley's Wizard Wheezes, a Portable Swamp, and a Monster Book of Monsters (which was really a lot of fun to make).  I also made a "mountain" out of boxes for the castle.  They took so long to make because I would pull them out when I had a little bit of time here and there.  The castle also ended up being a much bigger project than I originally thought.  I ran out of time this weekend, but if I get the chance, I'll take pictures of all these projects and post them.  

In the meantime, here are some pictures of the goodie bags I put together for the kids.  

   
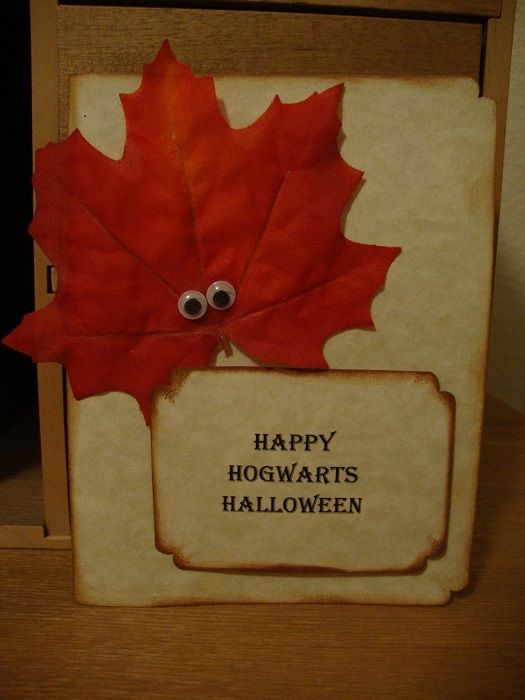
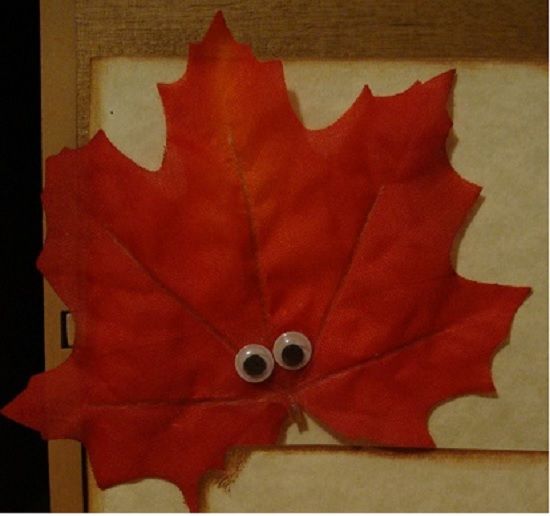
This is a picture of the card I made for the bags and because I made eighty of them, I started quite awhile ago.  They really didn't cost much to make as I had most of the materials on hand.  The only thing I had to purchase were a few more of the maple leaves as I didn't have enough left over from a previous project I had done.  I used leftover cardstock from a mini-album I just did that combines my interest in the sinking of the Titanic and other liners of the early 1900s with my first time seeing the Atlantic Ocean.  To make the Hogwarts card, I cut each piece of paper in half and distressed the edges to give it an aged look using Distress Ink in Vintage Photo.  I then took a maple leaf and added some eyes to it.  I put a foam mounting square on the back of the tag to raise it up a bit and make it more interesting.  I distressed the edges of that as well to give it an aged look. 


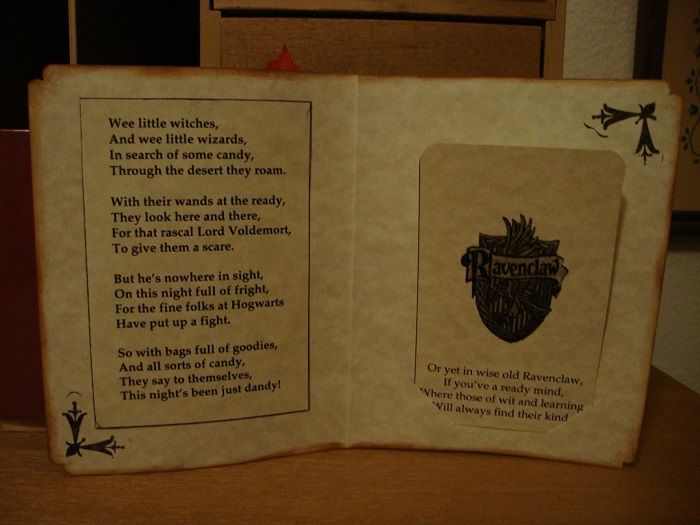
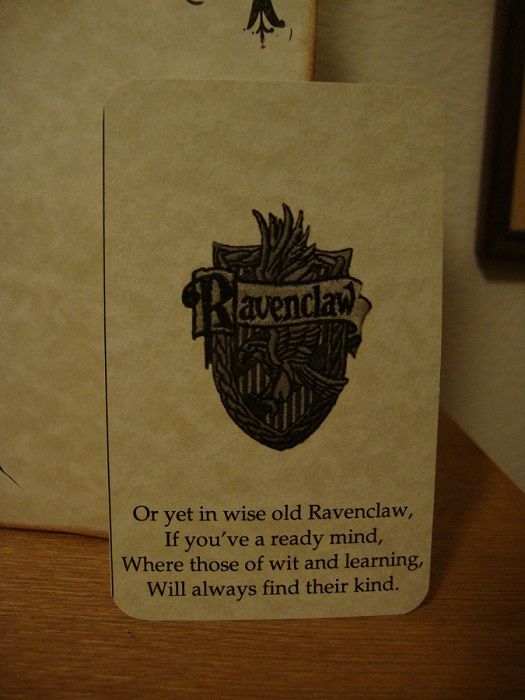
For the inside of the card, I wrote a poem, printed it off my computer, outlined it in black, and then pasted it onto the left part of the card.  I designed the right side of the card so that the tag could be removed and used as a bookmark.  I put a simple stamp on both sides of the card.  I made different bookmarks for Gryffindor, Hufflepuff, and Ravenclaw using the house crest and the relevant portion of the Sorting Hat song from the book for each house.  I didn't make any for Slytherin because I thought it might be too mean and make a kid feel bad.  The crest looks a little dark in the photo but is actually much lighter.

 
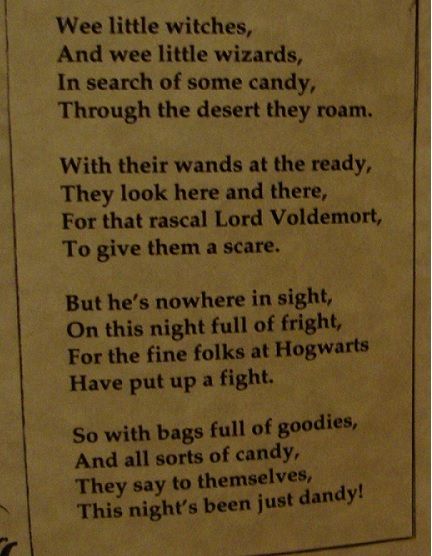
 The poem on the left side of the card.  It reads: 

Wee little witches,
And wee little wizards,
In search of some candy,
Through the desert they roam.

With their wands at the ready,
They look here and there, 
For that rascal Lord Voldemort, 
To give them a scare. 
 
But he's nowhere in sight, 
On this night full of fright, 
For the fine folks at Hogwarts
Have put up a fight.

So with bags full of goodies, 
And all sorts of candy,
They say to themselves, 
This night's been just dandy!


  The bookmark taken out of the card.

For the treats in the goody bags, I made them Hogwarts related.  Here are a few of the things I came up with.  I'll probably try to come up with some more.  It shouldn't be too hard.  That or else I'll just throw some more candy in the bag.  After all, that's what Halloween is all about for the kiddos.  :-)


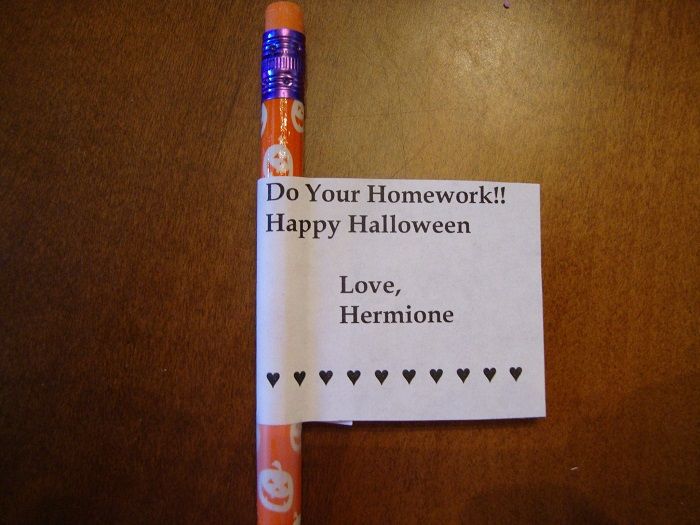
A pencil from Hermione, who always knew the importance of doing her homework!


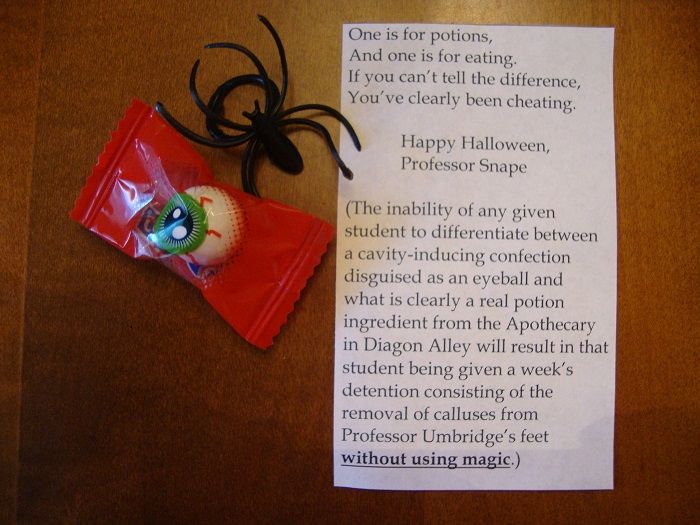
I wrote another poem and put it in a baggie along with a plastic spider and a piece of gum.  It's a little bit hard to tell in the picture, but the wrapper looks like a bloodshot eyeball.  The poem reads:

One is for potions, 
And one is for eating.
If you can't tell the difference, 
You've clearly been cheating.

                         Happy Halloween,
                 Professor Snape

(The inability of any given 
student to differentiate between
a cavity-inducing confection
disguised as an eyeball and 
what is clearly a real potion
ingredient from the Apothecary
in Diagon Alley will result in that
student being given a week's 
detention consisting of the
removal of calluses from 
Professor Umbridge's feet
without using magic.)


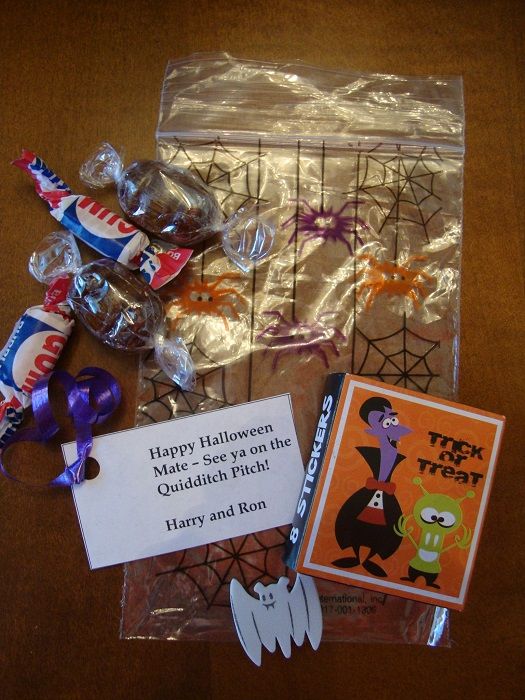
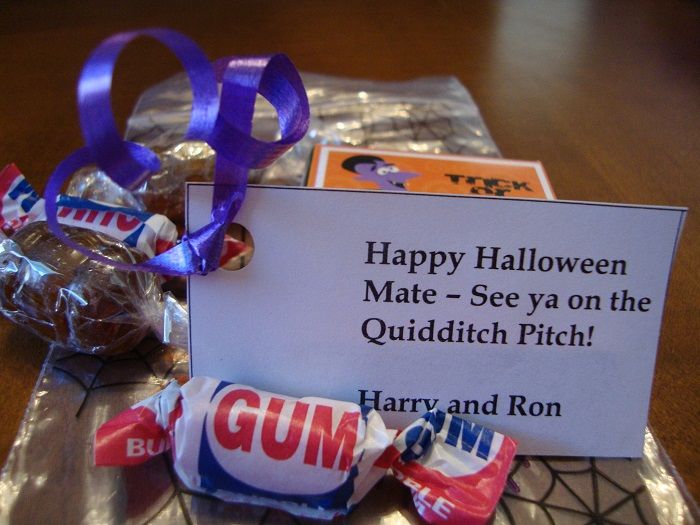
 This is a goody bag inside a goody bag, so to say and is from Ron and Harry.  The bag is really cute - little orange and purple spiders with eyes and some cobwebs printed on it.  I found some stickers in a box and added some foam stickers that I had left over from a craft project.  I also had some leftover purple curling ribbon from a previous project and it fit perfectly with the purple spiders on the bag so I added that to the tag.


The tag on this one reads: 

Happy Halloween
Mate - See ya on the
Quidditch Pitch!

Harry and Ron


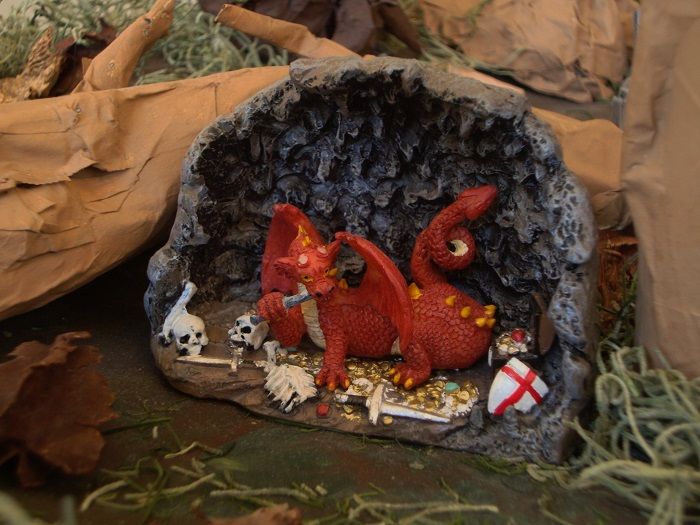
Yes, these are little plastic Easter eggs, but everyone who has read the Harry Potter books knows that Hagrid once hatched a dragon in his hut so I thought it would be cute to include this.  The tag reads: 

Ya didn't think there was 
gonna be a dragon egg in
here, now did ya?

Happy Halloween, 
Yer pal, Hagrid

So those are the goody bags that I've made up.  I have amazing memories of Halloween growing up - running around with pillow cases full of candy until at least 10:00 p.m. with my siblings (and it wasn't considered rude to be knocking on doors at that hour!), the smell of fireplaces and lit pumpkins, the cool night air, the costumes, and sorting all our loot when we got home.  Good times, good times.  :-)